Showing posts with label Fruit Pies. Show all posts

Thursday, December 15, 2011

Apple Strawberry Basil Hand Pies

If you think making pie is a lot of work, making hand pies takes the cake! But when it's a cold afternoon and you have nothing to do, these babies will bring warmth and love to your table.

On one such afternoon I was browsing some of the foodie blogs and came across this recipe. I grow basil, strawberries and apples, so I was intrigued by the notion of bringing them together. The pies turned out quite delicious and although I wouldn't marry the flavors very often, this was a fun, albeit labor intensive, treat.

Check out the fun blog Passionate About Baking for some beautiful photography and interesting recipes.


Tuesday, December 13, 2011

Wonderful Strawberry Pie


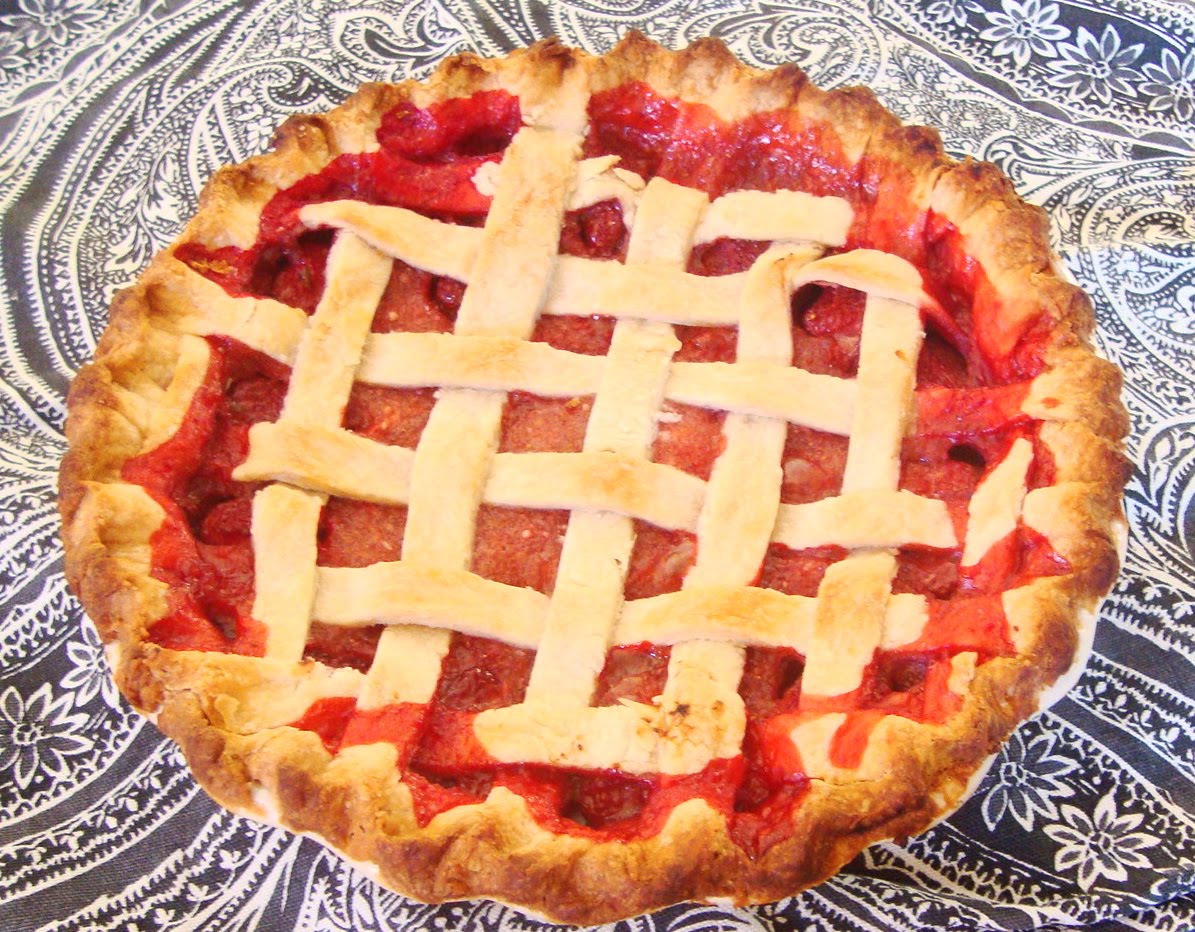
This baked strawberry pie was my very first attempt to make a lattice top. I have practiced a few times since to discover the best way to accomplish this. I tried making the lattice on the countertop and then transfering it to the pie. Although the making part is easier, the transferring part was nearly disasterous. Making the lattice on the pie is a little messy but I think I have figured out how to do a weave more systematically and it works pretty well now.

I got this recipe from my new vintage pie book Farm Journal's Complete Pie Cookbook. In my lifetime I don't think I could ever make all the pies in that book. But I'll try! This was a fun and tasty pie and a good way to have strawberry pie in the winter. I'm working on getting permission to share the recipes but in the meantime, you should just get your own copy! Gotta Love Amazon!

Thursday, October 27, 2011

8 lb apple pie

October is harvest time for my Gordon and Fuji apple trees. Every year they get bigger and bigger. These are great baking apples because they are nice and juicy, bake quickly and are not too sweet. Aren't they pretty to look at?


Since I have a handy dandy apple slicer, corer, peeler, it takes no time at all to get the fruit fixed up for the filling. I'm using a deep 10" dish so I can really pack the apples in high and thick.


With this many apples, I made the edge extra thick since I knew it would be in the oven for an hour or so. I sealed it well so my delicious juices would not all drip to my un-appreciative oven floor.

After it was baked I put in on the scales. It weighed in at 8 lbs. My goal is a 10 lb apple pie. I feel like doing it right now!! Too bad there are already 2 pumpkin pies in the fridge. Sometimes I just have to stop myself.

Friday, September 30, 2011

Strawberry Parfait Pie

I made this pie by creating a cream cheese/powdered sugar/cool whip/lime juice mixture and layering that with bananas and strawberries. I sprinkled powdered sugar and lime peel on top to make it all look frosty. I wish I had written down the amounts so I could share a recipe with you, sorry 'bout that! Try it anyway and let me know what you come up with.


Monday, September 26, 2011

Perfect Pie Crust Tutorial

Mix together 2 cups of flour and 1/2 tsp salt in a metal or glass bowl.

Add 2/3 cup of Crisco shortening.

Using a pastry blender, cut shortening into flour until well distributed.

Shortening balls should be no larger than small pea size. Fill the 2/3 cup with ice and then water. Let water chill for 1 minute.

Drizzle 1/2 the water over the flour.

Toss the contents with a fork to distribute water.
Continue adding water and tossing with a fork until all flour has been absorbed and dough begins to ball together.
Press half the dough together in a handful to make a ball. Try not to work dough very much. Use a few kneading motions to bring the dough together. This is the most important step to getting a flaky tender crust. You mustn't handle the dough too much.
Handling carefully, make a disc out of the ball.

Make a disc with the remaining dough. Add a bit of water if necessary. Total water should be about 1/2 cup. At this point you can wrap the disc in platic wrap and chill for 1/2 hour or more. I have not found it necessary.

Lay dough on floured surface and press flat, keeping sides composed.

Roll carefully, flipping dough as necessary to add flour to the surface. Create a circle.


Your dough should look marbled.

Make the dough large enough to expand a couple of inches beyond your pie dish. It should be about 1/8" thick.

Fold the dough in half and bring it to the pie plate. Place the fold at the center line.

Gently manipulate the dough so it fits down into the pie dish, leaving a little to hang over the sides. If you are making a double crust pie, continue reading. If you need a prebaked crust, flute the edges, trim and poke with a fork to allow for steam. Check out the post of creative crusts for further instructions.

This is a mixure of 6 cups apple slices, 1/4 c flour, 3/4 c sugar and 1 tsp. cinnamon.

Pour the apples into the pie plate and arrange them so they are well contained and laying flat.

Repeat preparation with the remaining dough disc. Lay it over the apples.

Lift the bottom crust and tuck the top crust under. Press together well to make a thick ring around the edge.

Pinch/twish the dough at an angle to make a pretty edge

Use a butter knife to slice away the edges and make a clean finish.

Brush the crust with a tablespoon or so of cream or milk. Sprinkle with sugar. Make small slices into the dough for venting. Bake on a baking sheet (to catch spills) at 375 for 45-60 minute. The pie is almost done when the filling is bubbling and steam is coming out of the vents. Let it cook 5-10 minutes more depending on the variety of apple you used and your desired tenderness for the apples. You can stab an apple slice through a vent hole to check for doneness. Let cool 30-60 minutes to allow filling to set.

OOPS! This pie was so flaky and tempting we couldn't even wait to take a picture.
Good Luck making a wonderful, flaky, tender, beautiful pie crust.

Friday, September 9, 2011

Just Can't Get Enough Peaches

I don't have much of a peach tree, but I got just enough to make one recipe. I chose to try out the Barefoot Contessa's Peach and Raspberry Crisp. Don't judge me for not making a pie! A crisp fills the same hole a pie does, and sometimes that's just what sounds good. Just wait till you read my post about the worst peach pie I've ever made, then you'll understand that not all pie is created equal. This crisp was so delicious I could have eaten it every night for a month! Too bad I ran out of my home grown peaches.


Peach and Raspberry Crisp


Ingredients

  • 4 to 5 pounds firm, ripe peaches (10 to 12 large peaches)
  • 1 orange, zested
  • 1 1/4 cups granulated sugar
  • 1 cup light brown sugar, packed
  • 1 1/2 cups plus 2 to 3 tablespoons all-purpose flour
  • 1/2 pint raspberries
  • 1/4 teaspoon salt
  • 1 cup quick-cooking oatmeal
  • 1/2 pound cold unsalted butter, diced

Directions

Preheat the oven to 350 degrees F. Butter the inside of a 10 by 15 by 2 1/2-inch oval baking dish.

Immerse the peaches in boiling water for 30 seconds, then place them in cold water. Peel the peaches and slice them into thick wedges and place them into a large bowl. Add the orange zest, 1/4 cup granulated sugar, 1/2 cup brown sugar, and 2 tablespoons of flour. Toss well. Gently mix in the raspberries. Allow the mixture to sit for 5 minutes. If there is a lot of liquid, add 1 more tablespoon of flour. Pour the peaches into the baking dish and gently smooth the top.

Combine 1 1/2 cups flour, 1 cup granulated sugar, 1/2 cup brown sugar, salt, oatmeal, and the cold, diced butter in the bowl of an electric mixer fitted with a paddle attachment. Mix on low speed until the butter is pea-sized and the mixture is crumbly. Sprinkle evenly on top of the peaches and raspberries. Bake for 1 hour, until the top is browned and crisp and the juices are bubbly. Serve immediately, or store in the refrigerator and reheat in a preheated 350 degree F oven for 20 to 30 minutes, until warm.


Tuesday, July 12, 2011

Strawberry Pie

Can you believe how good these look? Strawberry pie is pretty much a no-brainer. I use the recipe from Betty Crocker.

Strawberry Glace Pie
9-inch baked pie shell
6 cups strawberries (about 1 1/2 quarts)
1 cup sugar
3 tablespoons cornstarch
1/2 cup water

Bake pie shell. Mash enough strawberries to measure 1 cup. Mix sugar and cornstarch in 2-quart saucepan. Stir in water and strawberries gradually. Cook over medium heat, stirring constantly, until mixture thickens and boils. Boil and stir 1 minute; cool.

Fill shell with remaining strawberries; pour cooked strawberry mixture over top. Refrigerate until set, at least 3 hours.

-Quenta


Friday, July 1, 2011

4th of July Apple Pie


I love how pie crust is an artistic medium. I made two of these pies to give to friends. They were very impressed!  I made apple pie so the name would rhyme and added the stars and stripes to make them beautiful and patriotic. 

I brushed on a little milk and sprinkled with generous amount of sugar to give the crust a crispy crunch. Milk can make a crust brown too quickly, so make sure to lightly rest a sheet of foil over the pie when it looks just right. Then finish baking as normal. How have you prettied up your pies? 

Have a great 4th!

-Quenta

Sunday, June 26, 2011

Double Good Berry Pie

We have a boysenberry bush and every June it produces berries faster than we can pick them (or faster than we can get our stained berried fingers cleaned!). What better way to use these scrumptious berries than to make a fresh pie. Especially because we heard boysenberries don't do too well in jams and smoothies because the seeds sink to the bottom. Let us know if you feel differently.


This recipe is actually for blueberry pie, but it worked just as well for boysenberries. I feel it would work for most other berries; except for maybe strawberries. Strawberries are their own unique kind of berries.

Double Good Berry Pie
3/4 Cup Sugar
4 Tbsp. Corn Starch
1/8 tsp. Salt
1 Tbsp. Butter
1 Tbsp. Lemon Juice
2 Cups Berries
1/4 Cup Water

After boiled add:
2 cups berries

Mix together in medium sized sauce pan, boil until thick. Remove from heat and add butter and lemon. Cool and then fold in rest of berries (you will use 4 cups of berries all together). Pour into cooked crust. If you can hold off temptation to eat the whole thing right there and then, chill overnight to let pie set completely.

*Fun Fact #1: The word boysenberry comes from old Scandinavian rituals about boys who would court girls by bringing them berries. Boys who could find the plumpest berries got the prettiest girls.

*Fun Fact #2: Actually, I have no idea where the word boysenberry comes from. I totally just made up fun fact #1. But it sounds legitimate.

-Elissa